The first decision is what kind of doll to make. Well my thought process was this:
- I had a lot of gorgeous blue hued beads
- February is traditionally Carnival
- a kind lady named Linda from the Coast Collective gave me some peacock feathers
- I love, love making mermaids
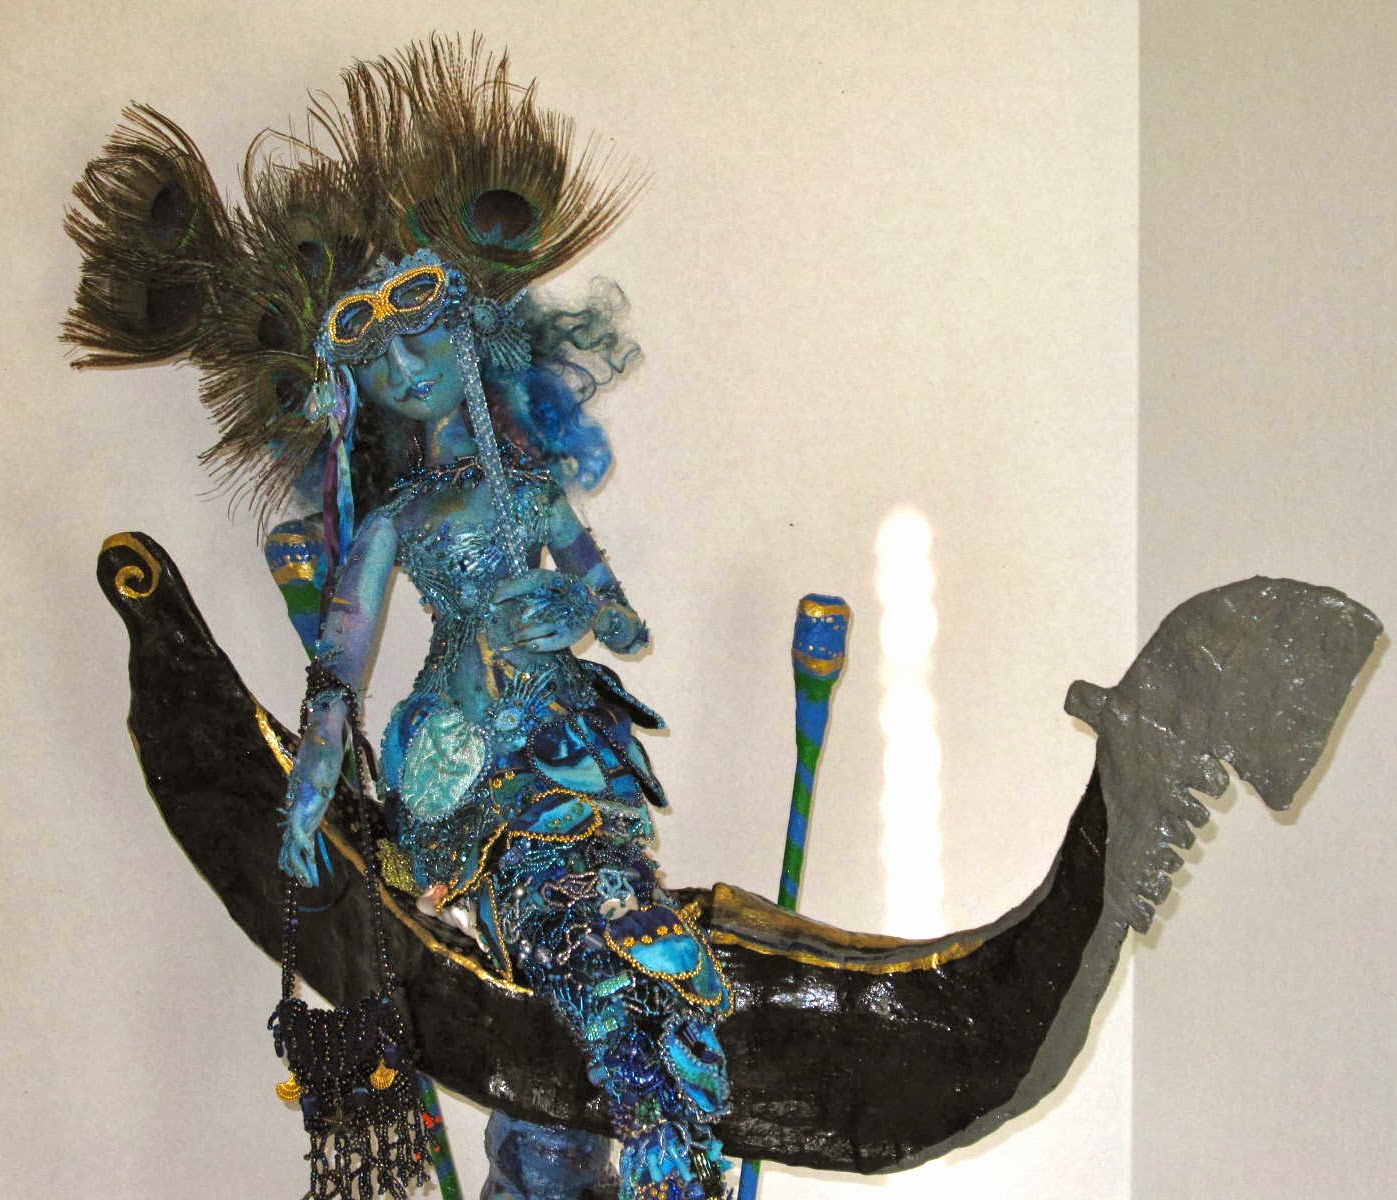
You have probably guessed where this is going! I decided to make a mermaid going to the Venetian carnival. She was to represent Venice as Venice is also known as "the queen of the sea". The mermaid would be holding a peacock mask and would arrive on a gondola!
The next step was to assemble some appropriate pictures/fabrics to inspire me:
 |
| Print by local artist Jill Louise Campbell |
I looked through a book I had on Venice during Carnival. I loved the Kaufman print fabric and I had a small piece left that I could use for inspiration and to include in the mermaid tail. I had a mask that I purchased a while ago and a picture of a mask based on peacock feathers, plus a print of Venice painted by a local artist-a good beginning.
 I decided to use Arley Berryhill's mermaid pattern (from a workshop taken a few years ago) as the base for my mermaid. This mermaid is made with plain muslin or cotton fabric and assembled. It is then painted free hand using textile dyes (Jacquard is what I used). The stuffed doll body is sprayed with clean water and then the dyes are dropped on the body free hand or with a small brush.
You can see that I used the Kaufman print fabric as my inspiration for colouring the mermaid body, face and arms. The colours I used were: (Jacquard Texile fabric dye)

- 111 Sky Blue
- 114 Turquoise
- 571 Pearl Turquoise
- 562 Metallic Olive
- a Blue Cobalt (Pebeo Setaclor #11)
- plus a Delta Ceramcoat Metallic Gold (Gleams)
I then made the mermaid tail using the Kaufman print and some additional fabrics to supplement as I did not have enough of the print. Also I wanted a "crazy patch" technique for the tail as I wanted to use her tail as a great base for my beading!
I then had to decide on how to construct the gondola. I used a candlestick for the base and then I used cereal box cardboard to construct a gondola shape go go around the top of the candlestick. I taped the cardboard gondola to the candlestick and then covered the entire thing with aluminum foil.
I used plaster cloth (can be purchased in craft shops such as Michaels) to cover the structure. The plaster cloth adds a lot of strength and stability and brings the various components together to form the sculpture. It is a white base and can then be gessoed and painted:
You can see that I glued the candlestick base to a square base board and then drilled three holes for the sticks to represent the poles to which the gondola is anchored when not in use.
Now I went to town with painting the gondola (first sand lightly and gesso to seal the piece):
I painted the gondola in black with gold highlights. The base was coloured with acrylic paints in different hues of blue to represent the water while the poles are sky blue and bright green with gold accents. I was very pleased with the finished product. A added a gloss finish to seal the paint. Below is a close-up of the base with swirls to represent the waves lapping the shoreline.
I then started to bead! What fun I had using my beautiful blue beads. I did fringe, raised beading, random scatter beading, peyote stitch, brick stitch, lazy stitch at perpendicular angles to create a basket weave effect, and so on and so on!
For beading techniques, there are many great reference books but two that I use frequently are:
- Beaded Embellishment by Amy C. Clarke and Robin Atkins
- Beading on Fabric by Larkin Jean Van Horn
The masquerade mask is next so I used kitchen towels to draw a shape and placed it against the mermaid's face to get the correct size. I then used a small piece of ultra suede for the mask base and I beaded away: Once the beading was done I glued the peacock feathers to the side and then made a felt backing and glued it to the back to cover the threads from the stitching. I used a small stick as the mask handle which I then beaded using circular peyote.
I also decided that the Queen of the Sea would love to have a beaded amulet purse to carry her mirror and her shells so I made her one:
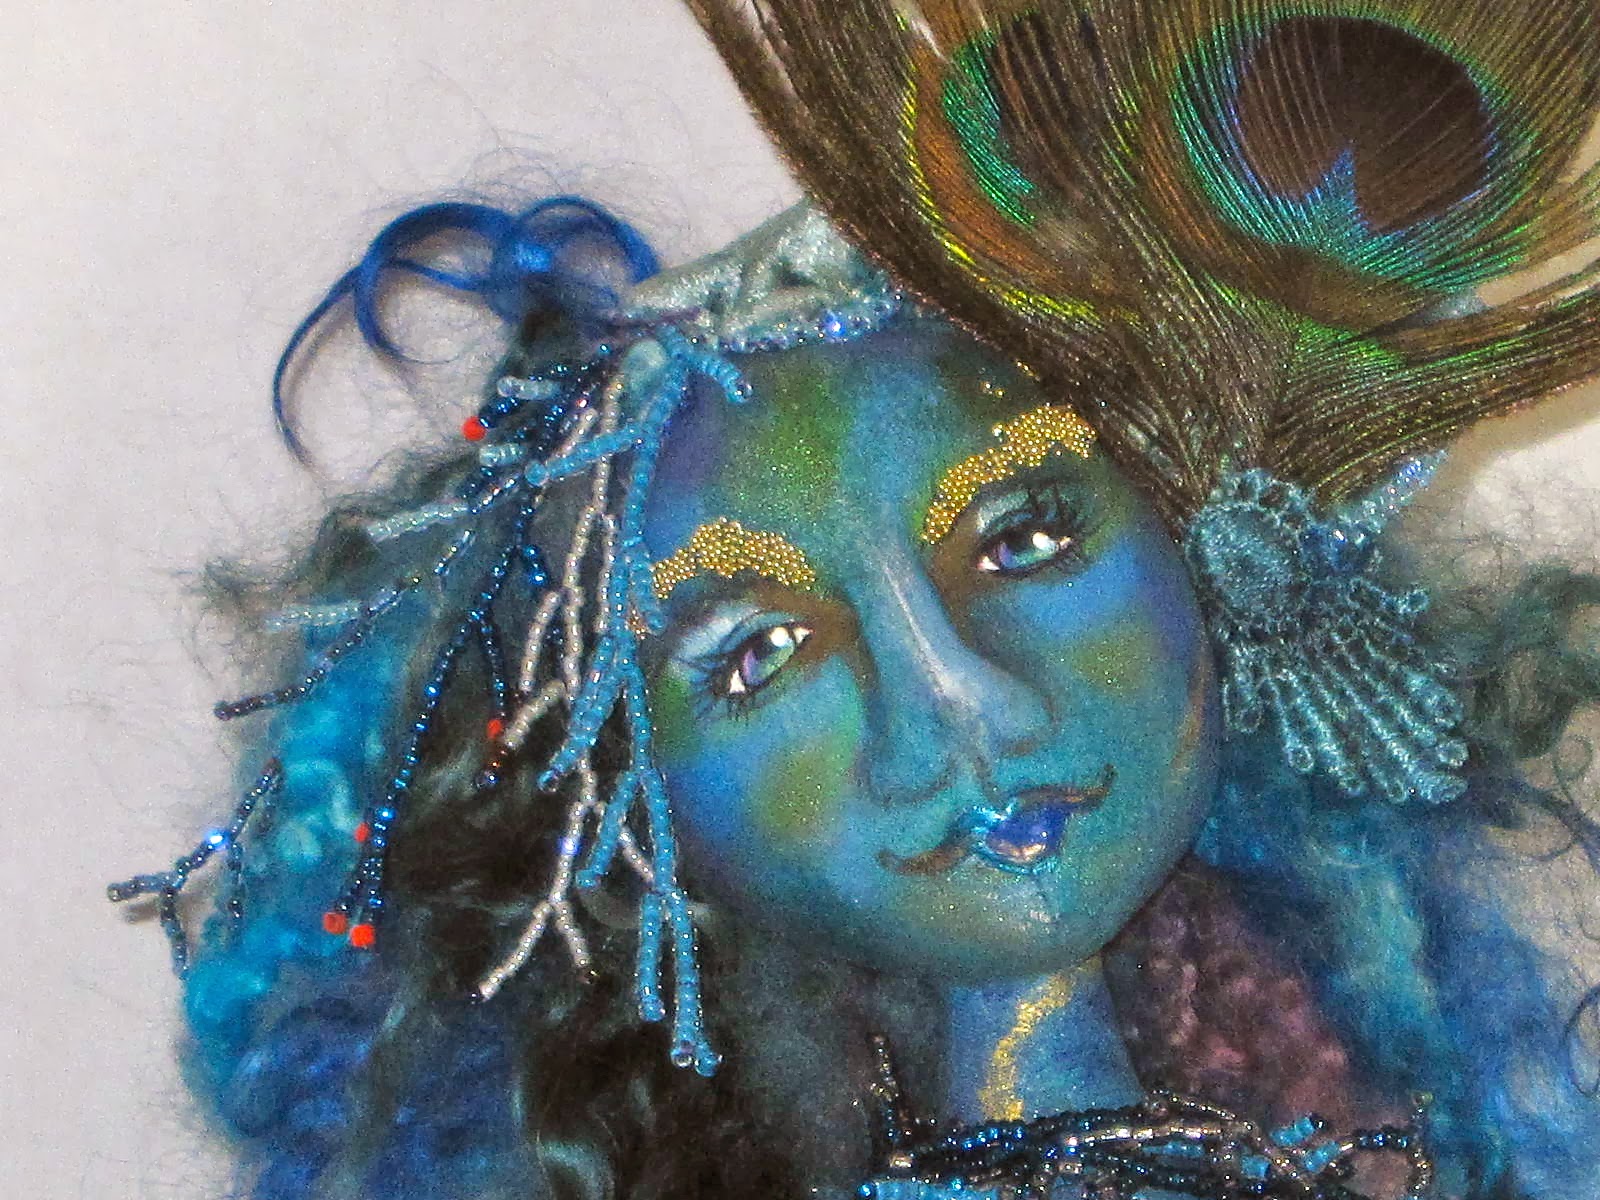
OK, I have delayed just long enough. I present to you "Venezia, Queen of the Sea":
 |
| A close-up of her face showing her mohair locks for her hair and her branched fringe adornment. |
One final look:
I hope you enjoyed this doll and the process of creation.


No comments:
Post a Comment